Here’s another classroom idea for using mobile devices and QR codes. It’s a simple idea, based around the concept of a treasure or scavenger hunt, where students need to find specific information in various locations. In this case, my international students in the UK all had smartphones, but not 3G connections. This meant we had to rely on the school’s Wi-Fi network, and the location of the activity was limited to the school building itself.
Here’s how the activity worked:
Before class
1 I prepared 10 questions based on various locations around the school. Each question related to a specific location in the school, and some required the students to speak to people in that location, or to take a photo, or to note things down. The questions were related to language and structures the students had covered in previous classes, so provided a chance to review and practice. The questions also covered a number of skills (listening, speaking, writing, and reading). Each question told the students where to go next. I printed out the list of question in a list, for my own reference during the activity (recommended!. Here they are:
- What 3 things do you enjoy doing on weekends? Write them down. Next: Activity Zone
- Activity Zone: What activities are on in Cambridge this weekend? Write down two you like. Next: Dining Room
- Dining Room: What is for lunch today? How much is it? Take a photo of the menu.
- Dining Room: Take photos of 3 other foods you see. Next: Lecture Theatre
- Lecture Theatre: How many chairs are there in the room? What colour are they? Next: Reception
- Reception: Ask 2 people in Reception for their full names, and write them down. Ask to take a photo of the 2 people – ask permission first!
- Learning Centre: Find the elementary graded readers. Write down 3 book titles. Next: Find room 1.11
- Room 1.11: Ask Katherine 3 questions about her family, her job, and what she enjoys doing. Prepare your questions first, and practice. Audio record the interview. Next: Our classroom.
- Our classroom: Ask Nicky 3 questions about her family, her job, and what she enjoys doing. Audio record the interview. Go to Question 10.
- You’re finished! Well done!
(Question 10 is not really a question, but ‘closes’ the activity)
Tip: Before you create your questions, check that any people potentially involved (e.g. for interviews) are happy to take part and/or to be photographed, and that they will be available in situ during the time of your class to answer your students’ questions!
2. I copied and pasted each question to a free QR code generator – I used Kaywa. I saved and printed each QR code, and then added a number to each one in pen (Q1, Q2, Q3).
3. Before class, I went to each location and stuck the relevant QR code on the wall. This is where having previously numbered each sheet, and having a list of the questions, made it quick and easy to stick the right QR code in the right place!
During class
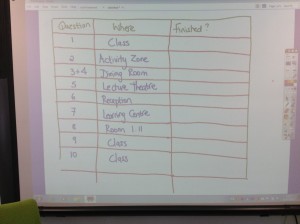
1 Without telling students why, I drew the following grid on the board and asked them to copy down it. I could have given them this on a typed handout, but this group of non-Roman script students needed the writing practice.
2 I showed the students the printed QR code for question 1, and asked them what it was. It turned out that the students had seen QR codes before, but none of them knew exactly what they were, or how to read them. None of the students had QR readers on their smart phones.
3 I asked the students to download the QR code reader i-nigma using the school Wi-Fi. In my experience, this is the best QR code reader. It’s extremely sensitive so reads QR codes very easily, it’s free, and it’s cross platform (available for IOS, Android, Blackberry, and Windows phones).
4 I asked the students to open i-nigma, and to get the camera ready. I took out the QR code for question 1 again, and students all read the QR code on their smart phones at the same time. There were grasps of surprise as the first question appeared on their phones screens!
5 I drew students’ attention back to the grid on the board, and together we filled in the first line. I then explained the rest of the activity, pointing out the locations of the QR codes on the board grid.
6 I put the students into pairs (and one group of 3), and assigned each group a letter (group A, group B, group C etc). I then marked on the board grid where each group needed to start. For example, group A needed to do question 2 next (in the Activitiy Zone), whereas group B needed to do question 5 next (in the Lecture Theatre), and group C needed to do question 6 next (in Reception), etc. This ensured that not all students were trying to complete the same task at the same time – especially important for the speaking tasks. The grid on the board helped show students that although they started at different points/with different questions, they need to then then follow the grid questions in order.
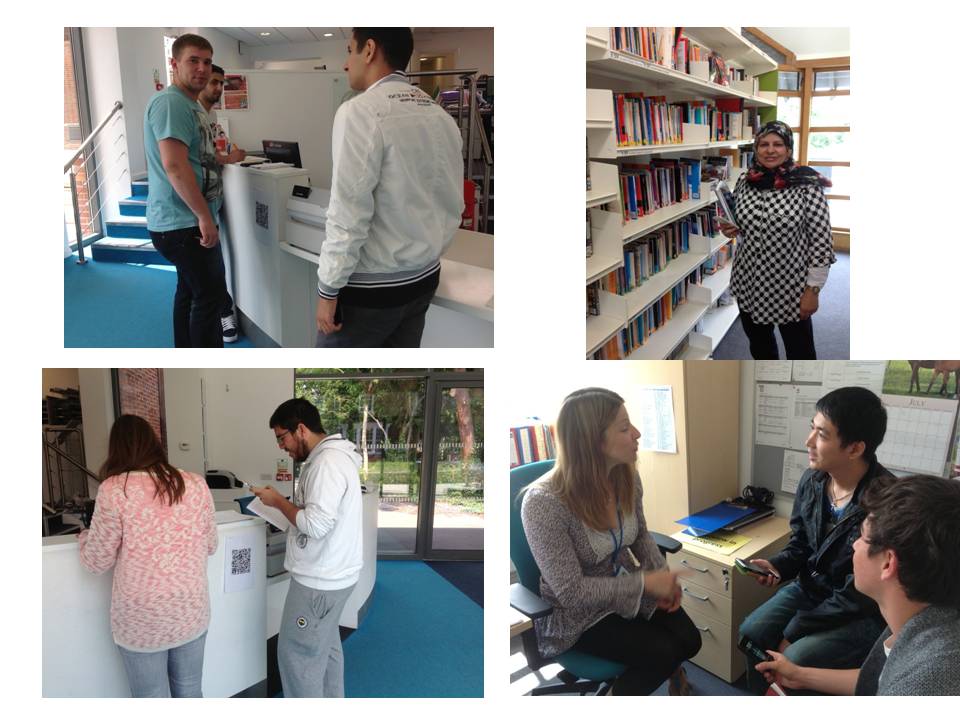
7 The groups went around the school reading the QR codes from the wall in each place, and completing each task. I gave the beginner’s group a time limit of 30 minutes, after which they needed to come back to the classroom whether they had finished or not. Here they are doing the task:
8 I regrouped the students, and they compared answers. We then checked answers with the class.
9 For homework, I asked students to listen to the audio recordings they had made for questions 9 and 10, and to write a short paragraph about each of the people interviewed.
Classroom management tips
- I first carried this activity out with a group of the very low level elementary students. Because this was an international group of students from all of the world, it wasn’t possible to give instructions in the mother tongue (which would have saved time!), so the first 3 classroom steps were very carefully staged, with lots of checking that students understood.
- The second group I tried this activity out with – intermediate students – were able to understand the and complete the tasks faster. The linguistic level of the students will determine how much time the entire activity takes, as will the number of questions you include.
- Assigning group/pair numbers to students, and ensuring that each group or parent starts at a different point in the treasure hunt, ensures that not everybody is doing the same task at the same time – particularly important if your tasks include interviews.
- Even with a copy of the grid, and the next location indicated within the QR questions themselves, the elementary students were sometimes unclear about where to go next. I made sure that I visited the various locations throughout the activity, helping students as necessary.
Variations
- This activity could work as part of an Orientation Day for new students, to get them to explore the school.
- If your students have 3G connections (and you live in a small town!), this activity could involve you putting QR codes in public places and designing tasks around each location (e.g. QR codes at the train station with the questions like What time is the first train to x?, How much is a ticket to y? etc).
- Your QR code questions/tasks can get students to practice just one skill (e.g. speaking only, or reading only, etc), or just one structure for lower levels (How many…?; What’s the name of the person in x location; etc).
- The higher the level of the students, the more complex/demanding the tasks can be.
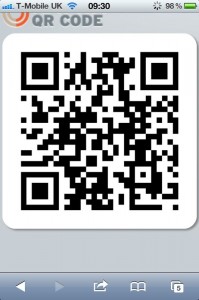
- As a follow-up activity students can be encouraged to each produce a single QR code task/question, and send it to you by e-mail. You can then print it out, and put it on the classroom wall for the next class – students then need to carry out their peers’ QR tasks/questions. The QR code at the top of this blog post was generated by one my students on his iPhone for homework.
Note: This activity forms part of a practitioner research project, commissioned by TIRF (The International Research Foundation). A paper examining design and sequencing of communicative language tasks with mobile and handheld devices, will be published on the TIRF website by the end of the year. I will blog a summary of it when it’s published!
What about you? Have you used QR code with your students? Would you do an activity like this with your own students? Let me know what you think in the Comments!
Blog posts for my TIRF Research Project:
- Intro to QR codes: A lesson for EFL students
- QR codes: A treasure hunt
- Water: Smartphones for vocab
- Mobile devices in EFL: What do students think?
Nicky Hockly
The Consultants-E
August 2013
More posts about QR codes:


